On this page
GreptimeDB, as a time-series database for the cloud era, has embraced cloud-native technology from day one. Deploying databases on Kubernetes offers scalability, self-healing, and simplified deployment and management, thereby providing robust elasticity and reliability for applications.
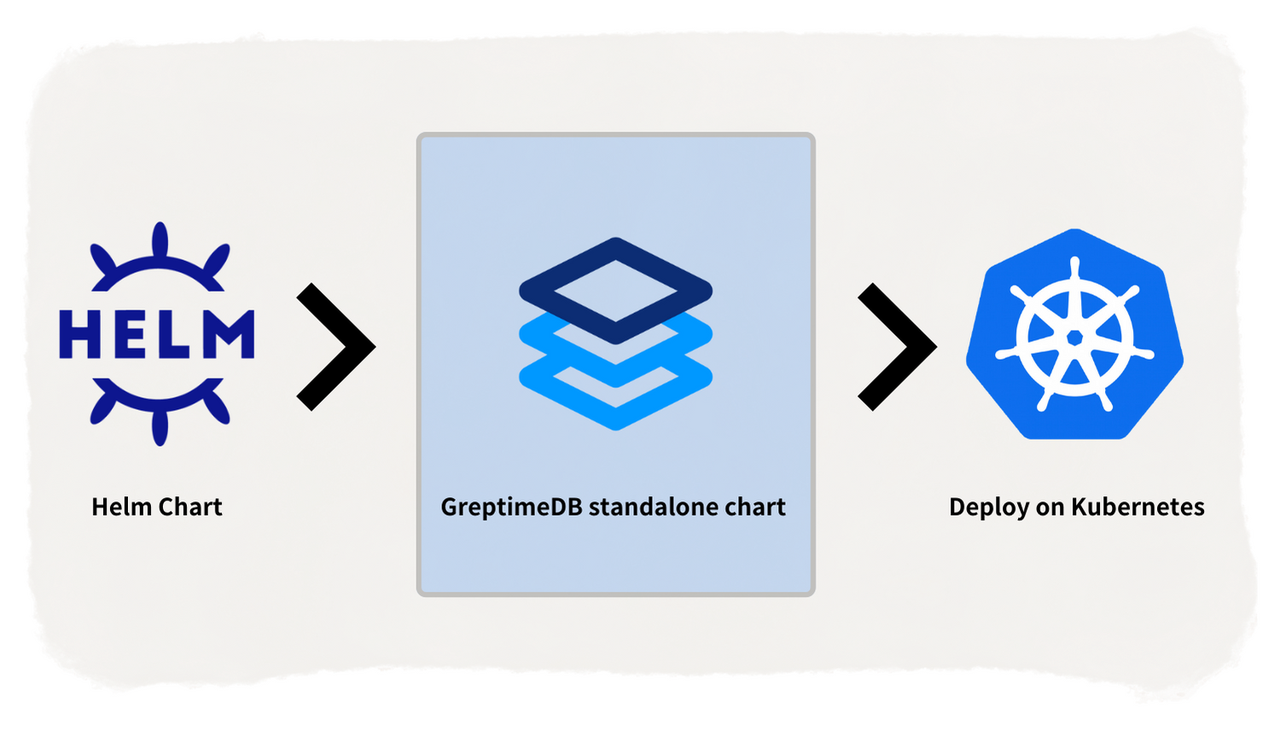
Helm is a package manager for managing Kubernetes applications. By using Helm Charts, applications can be easily packaged, configured, and deployed to Kubernetes clusters.
This article explains how to deploy Standalone GreptimeDB using Helm Chart and store data on object storage such as AWS S3.
Configure the Helm Chart Environment
First, you need to install the Helm tool, which can be done following the instructions in the installation document.
Before deploying the application, add the greptime repository to Helm, which contains a series of available Helm Charts.
Use the following commands to add the greptime repository to Helm:
plain
helm repo add greptime https://greptimeteam.github.io/helm-charts/
helm repo update
Use the following commands to view the greptime Helm Charts available:
plain
helm search repo greptime --devel -lInstall Greptime Chart
To install the standalone GreptimeDB, use the command:
sql
helm install greptimedb-standalone greptime/greptimedb-standalone -n defaultTo install a specific version of the chart, use:
plain
helm install greptimedb-standalone greptime/greptimedb-standalone -n default --version <chart-version>View GreptimeDB using the kubectl command line tool:
sql
kubectl get po
NAME                      READY   STATUS    RESTARTS   AGE
greptimedb-standalone-0   1/1     Running   0          15s
Store Data on AWS S3
In a previous tutorial, we shared how to run the GreptimeDB binary and save data to AWS S3. Similarly, we can also deploy GreptimeDB in a containerized manner and store data in the cloud, achieving greater elasticity and reliability.
The detailed steps are as follows:
sql
helm upgrade greptimedb-standalone greptime/greptimedb-standalone -n default \
  --set env.GREPTIMEDB_STANDALONE__STORAGE__TYPE="S3" \
  --set env.GREPTIMEDB_STANDALONE__STORAGE__BUCKET="bucket-name" \
  --set env.GREPTIMEDB_STANDALONE__STORAGE__ROOT="/test-data" \
  --set env.GREPTIMEDB_STANDALONE__STORAGE__REGION="s3-region" \
  --set env.GREPTIMEDB_STANDALONE__STORAGE__ACCESS_KEY_ID="your-access-key-id" \
  --set env.GREPTIMEDB_STANDALONE__STORAGE__SECRET_ACCESS_KEY="your-secret-access-key"
You can adjust the above statement or parameters to your S3 information:
- GREPTIMEDB_STANDALONE__STORAGE__TYPE: Specify the storage type as S3
- GREPTIMEDB_STANDALONE__STORAGE__BUCKET: Name of the S3 bucket
- GREPTIMEDB_STANDALONE__STORAGE__ROOT: Data storage directory, set here as
/test-data - GREPTIMEDB_STANDALONE__STORAGE__REGION: S3 region
- GREPTIMEDB_STANDALONE__STORAGE__ACCESS_KEY_ID: AWS Access Key ID
- GREPTIMEDB_STANDALONE__STORAGE__SECRET_ACCESS_KEY: AWS Secret Access Key
After the pod starts running, perform a test to write data into S3:
sql
kubectl port-forward svc/greptimedb-standalone 4002:4002 > a.out &Connect to GreptimeDB using MySQL protocol:
sql
mysql -h 127.0.0.1 -P 4002Execute the create table statement. Here the table name is s3_test_table:
sql
CREATE TABLE s3_test_table (
  host STRING,
  idc STRING,
  cpu_util DOUBLE,
  memory_util DOUBLE,
  disk_util DOUBLE,
  ts TIMESTAMP DEFAULT CURRENT_TIMESTAMP,
  PRIMARY KEY(host, idc),
  TIME INDEX(ts)
);
Insert data into s3_test_table:
sql
INSERT INTO s3_test_table
VALUES
("host1", "idc_a", 11.8, 10.3, 10.3, 1667446797450),
("host1", "idc_a", 80.1, 70.3, 90.0, 1667446797550),
("host1", "idc_b", 50.0, 66.7, 40.6, 1667446797650),
("host1", "idc_b", 51.0, 66.5, 39.6, 1667446797750),
("host1", "idc_b", 52.0, 66.9, 70.6, 1667446797850),
("host1", "idc_b", 53.0, 63.0, 50.6, 1667446797950),
("host1", "idc_b", 78.0, 66.7, 20.6, 1667446798050),
("host1", "idc_b", 68.0, 63.9, 50.6, 1667446798150),
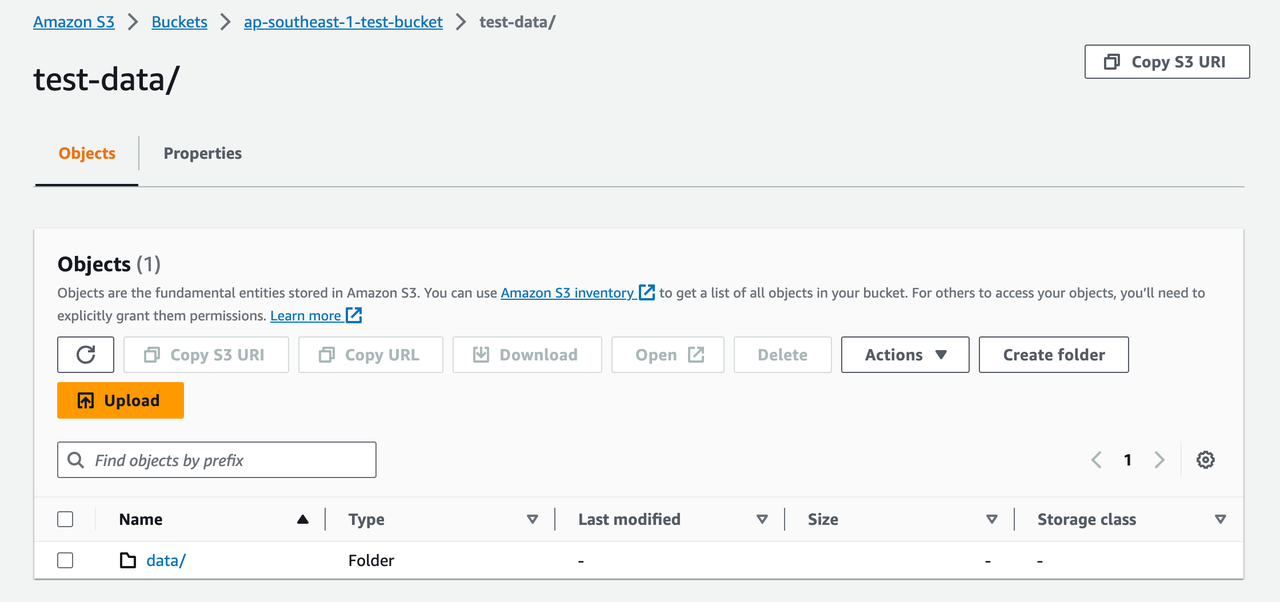
("host1", "idc_b", 90.0, 39.9, 60.6, 1667446798250);You can now log into the AWS S3 console to view the data that has been inserted:
You can also access GreptimeDB through the Dashboard:
sql
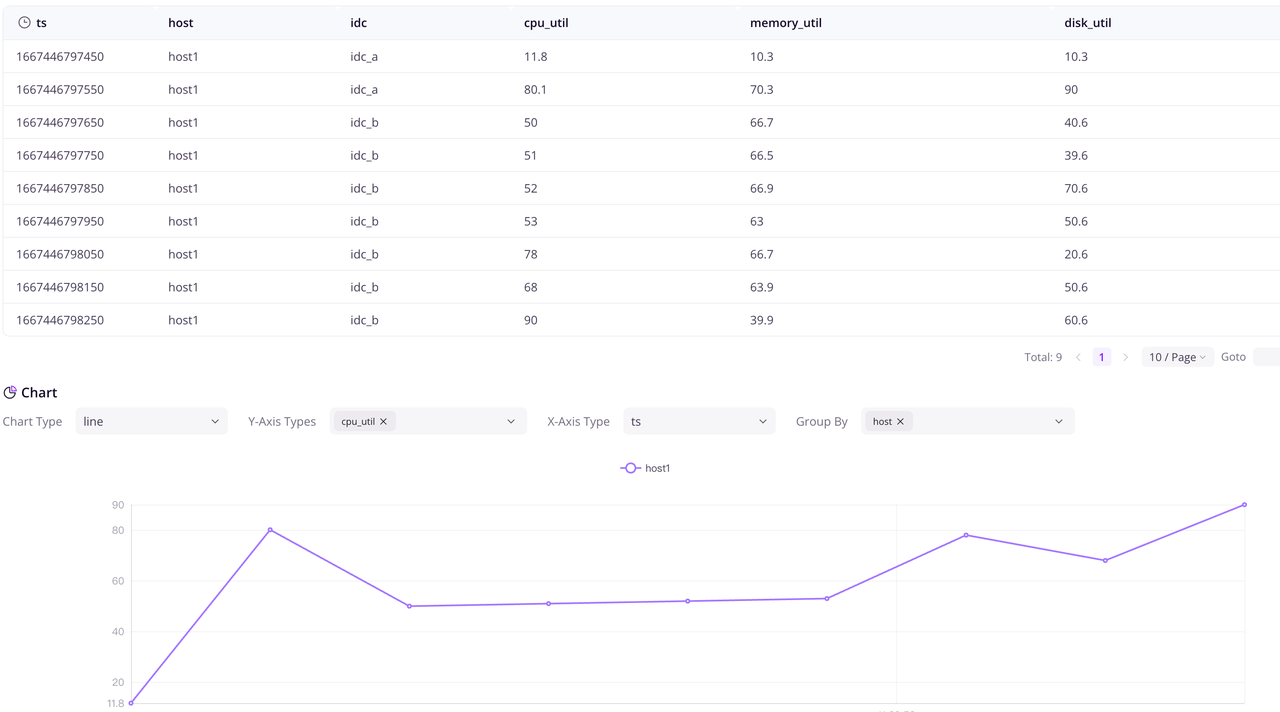
kubectl port-forward svc/greptimedb-standalone 4000:4000 > a.out &Visit http://localhost:4000/dashboard/query in your browser to view the Dashboard, and execute select * from s3_test_table; to view the data that has been written.
Summary
This article has provided a comprehensive guide on deploying Standalone GreptimeDB using Helm Chart, with a focus on configuring data storage solutions using AWS S3. This approach, particularly relevant in the cloud-native era, significantly enhances the flexibility and reliability of data management while streamlining both deployment and management processes. In our upcoming article, we will also introduce how to deploy distributed GreptimeDB using Helm Chart, so stay tuned!


